Adalogical Ænigma #10Walkthrough of the Example PuzzleGreetings, gentle patron!
What follows is a detailed description of how one might go about solving the example puzzle shown on the ænigma paper. I hope that you find it useful. For a copy of the ænigma itself, along with an abundance of other solving aids, please return to the main page for this ænigma.
Dedicated to your puzzle enjoyment,

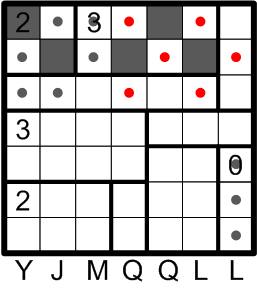
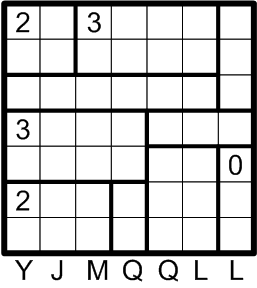 This is the example puzzle exactly as presented on the ænigma paper. We are given that we should darken some of the squares in the grid such that (a) every numbered region contains exactly that many darkened squares, (b) no two darkened squares are horizontally or vertically adjacent, (c) no horizontal or vertical sequence of undarkened squares intersects more than two regions, and (d) all undarkened squares throughout the grid are connected, horizontally and/or vertically.
Are the rules quite clear, then? Jolly good! Let's get started!
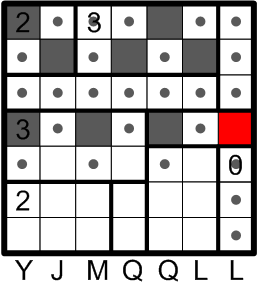
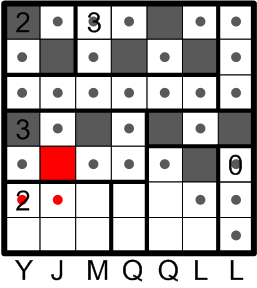
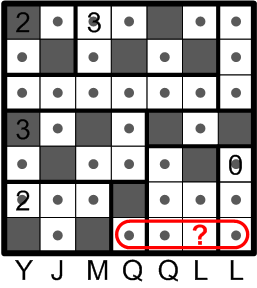
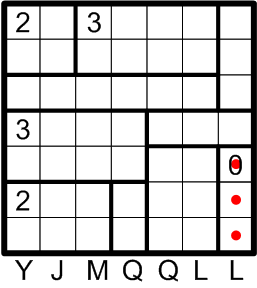 We begin by taking advantage of the region labelled with a “0”: by rule (a) above, we know it cannot contain any darkened squares, so we mark all of its squares with dots to denote that knowledge. Although our stated goal is merely to darken the correct squares, we shall find it ever so helpful also to make note of squares that we learn cannot be darkened. Rules (c) and (d), in particular, are much easier to apply when one can clearly visualize the known-undarkened areas.
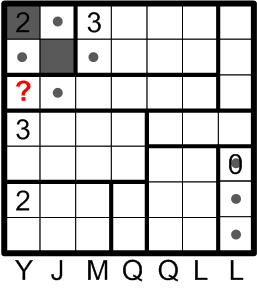
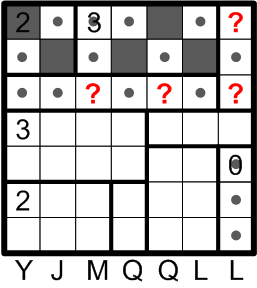
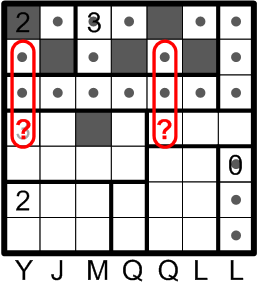
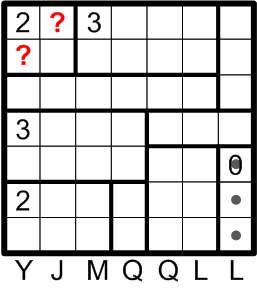 We next turn our attention to the 2×2 region in the upper-left corner of the grid, labelled “2”. Rule (a) tells us that we must darken two squares in this region, and rule (b) requires that those two squares not be adjacent. That leaves us with but two options for darkening the squares in this region: the two darkened squares must be along one of the two diagonals of the region.
Suppose that we darkened the squares labelled with question marks in this diagram. Then the upper-left square, labelled “2”, would not be darkened, and yet it would also not be connected to any of the other undarkened squares in the grid, thus violating rule (d).
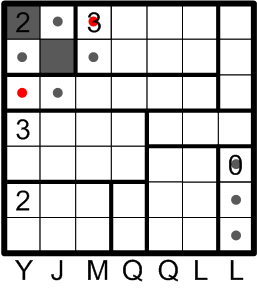
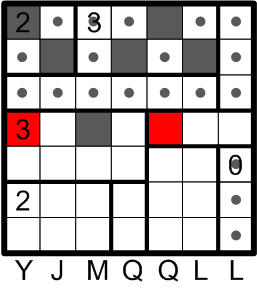
 We may therefore conclude that it is the squares along the other diagonal of this region that must be darkened.
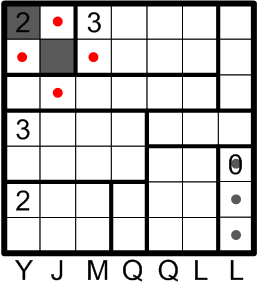 Rule (b), forbidding adjacent darkened squares, allows us to mark several more squares as not being darkened.
 Consider the indicated square in the diagram. If that square were to be darkened, then the undarkened square above it would violate rule (d), failing to be connected to the other undarkened squares in the grid.
 Thus, we know that that square must remain undarkened, and we notate it as such. Symmetrically, we do the same for the third square along the top edge of the grid.
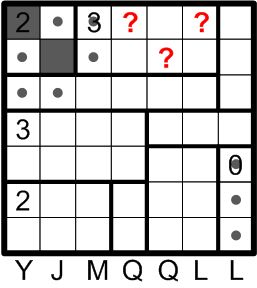 Next, let us consider the region labelled “3” at the top of the grid. With the knowledge we've gained so far, we've effectively reduced this region to but six squares in which to place the required three darkenings. As with the region labelled “2” earlier, rule (b) allows us only two ways in which to fill this region, the two possible chess-board-like colorings of alternating dark and light.
Following the same line of reasoning we employed earlier, suppose that we chose to darken the indicated three squares. Then the undarkened square at the centre of those three would be isolated from the rest of the grid, again violating rule (d).
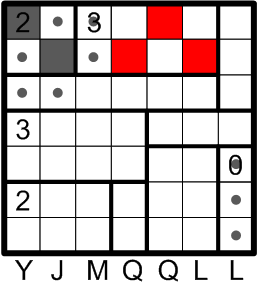 Once again, then, we may conclude that the other possible darkening pattern is the correct one.
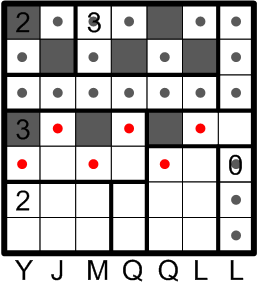
 We then apply rule (b) to mark several more squares as known to be undarkened.
 Rule (d) now reappears to aid us: if any of the indicated squares were to be darkened, then one or more undarkened squares would be “cut off” from the rest of the grid.
 We therefore mark all of those squares to reflect our knowledge that they cannot be darkened.
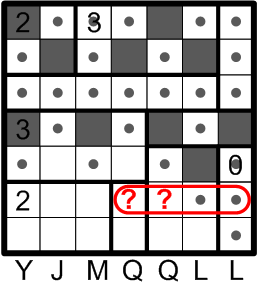
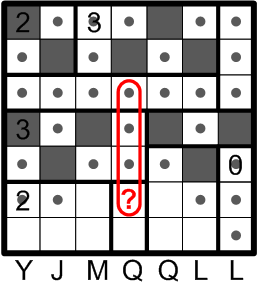
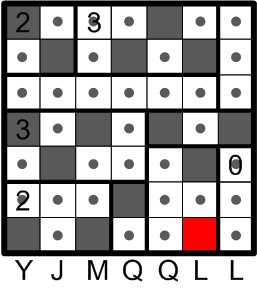
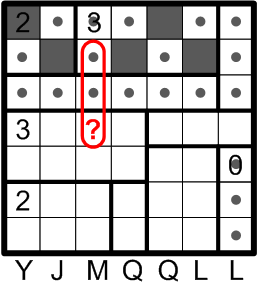 It finally time for rule (c) to come into play. If the square labelled with a question mark were not to be darkened, then we would have a vertical sequence of undarkened squares that crossed two region boundaries, as shown, thus intersecting more than two regions and violating rule (c).
 That square must therefore be darkened.
 The very same deductive technique may be applied in two other places in the grid, as indicated.
 That yields two more squares that we are forced to darken.
 We have some catching up to do in tracking our applications of rule (b).
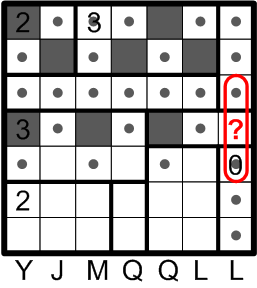 As it happens, there is actually one further site at which rule (c) may be applied. In this case, it may be a little more subtle to detect since the hypothetical undarkened sequence in question is interrupted by the indicated square. The reasoning is the same, however: if that square were to remain undarkened, the vertical sequence would intersect too many regions, in violation of rule (c).
 There is thus one more square we know to be darkened.
 Actually, yet another site has appeared where rule (c) requires us to darken a square. We also apply rule (b) to mark an adjacent square as undarkened.
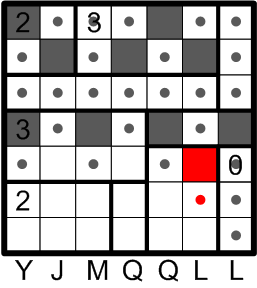
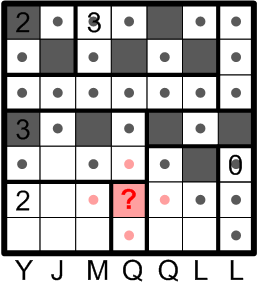
 Now we turn our attentions to the indicated square. Suppose that this square were to be darkened. Before reading ahead, try to visualise what further deductions would immediately apply. (Hint: it is rules (b) and (d) that would come into play.)
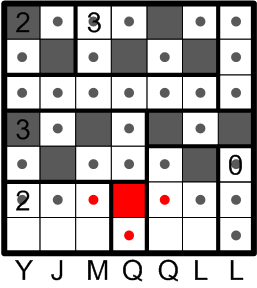
 If that square were to be darkened, as shown, then two further squares would need to remain undarkened, one by rule (b) and the other by rule (d). That would create a horizontal sequence of undarkened squares that intersected three regions, thereby violating rule (c).
 We may thus conclude that that square is not to be darkened.
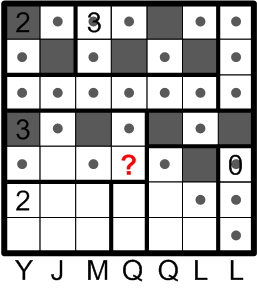
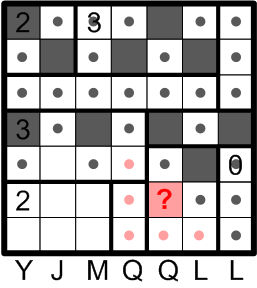
 Before we go further, for pedagogical purposes, I should like to demonstrate an alternate line of deduction leading to a similar conclusion. We start from the same situation, but ask instead about the two squares indicated by question marks here. They cannot both remain undarkened, because that would violate rule (c). Contrariwise, they cannot both be darkened, since that would be a violation of rule (b). We thus have two cases to consider, darkening one or the other of the indicated squares.
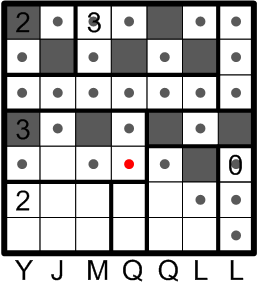
 First we consider darkening the left-hand candidate square. Rule (b) leads us to conclude that four other squares would then remain undarkened.
 Next we consider the right-hand candidate for darkening. By rules (b) and (d), there would in that case be five additional undarkened squares.
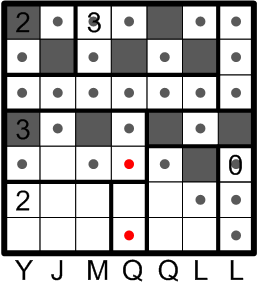 If you look back and compare the previous two diagrams, you will see that there are two squares marked as undarkened in both cases. That is, leaving these two squares undarkened is a necessary consequence regardless of which case actually obtains.
This sort of case analysis, in which we cannot actually eliminate either case from consideration, but where we can discover conclusions that are common to both outcomes, actually arises quite frequently in many of my ænigmas. You will often find it quite rewarding to practise this kind of deduction, even though it may at first appear slightly more involved.
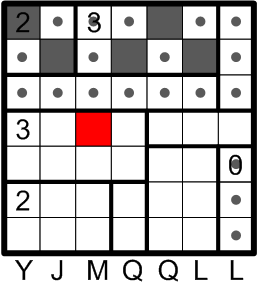
 Returning now to our earlier conclusion, we can see that the lower region labelled “3” has only one remaining location in which to add its required third darkening. Rules (b) and (d) then yield two further known-undarkened squares.
 We may now apply rule (c) again, may we not?
 Indeed, one more square may be darkened and its neighbors then marked appropriately.
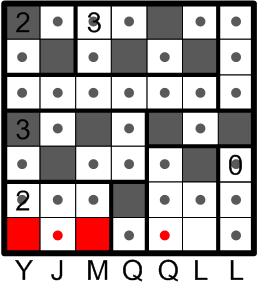 The lower region labelled “2” has been effectively reduced to a 1×3 shape, and there is but one way to darken two squares in such a region. We then apply rules (b) and (d) to mark two other squares.
 Finally, we are left with just one last site at which to apply rule (c): the indicated square must not be allowed to remain undarkened.
 We therefore darken that last square to finish off the grid!
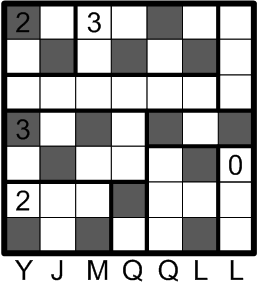 Here we pause for just a moment to savor our completed grid. (I have here erased all of the dots marking known-undarkened squares, in the interests of aesthetic clarity.)
All that remains now is to discover this ænigma's final answer.
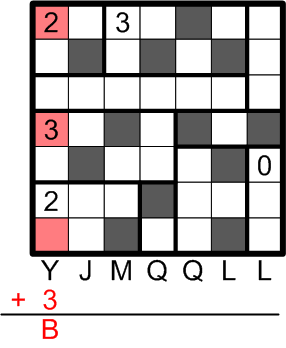 We are told to count up the darkened squares in each column and then to advance that many steps through the alphabet, starting from the corresponding letter at the bottom of the grid (and wrapping around from Z to A if necessary).
There are three darkened squares in the first column, so we advance three steps from Y, through Z and A to B.
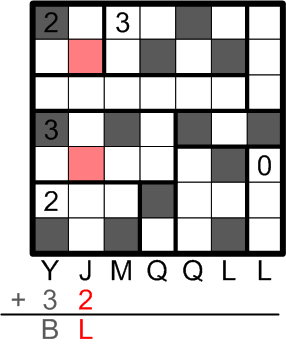 The second column contains only two darkened squares, yielding the answer letter L.
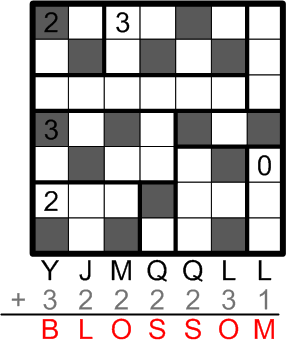 Carrying on in this fashion for the remaining columns fills in an answer appropriate to the gardening theme of this ænigma: the word “BLOSSOM”.
Bravo, we've done it! Now return to your efforts on the original ænigma!
|
Shopping Cart |