Adalogical Ænigma #3Walkthrough of the Example PuzzleGreetings, gentle patron!
What follows is a detailed description of how one might go about solving the example puzzle shown on the ænigma paper. I hope that you find it useful. For an abundance of other solving aids, please return to the main page for this ænigma.
Dedicated to your puzzle enjoyment,

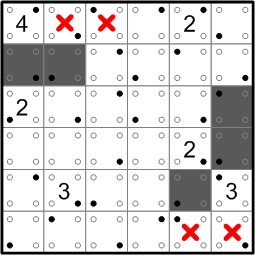
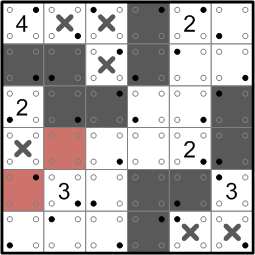
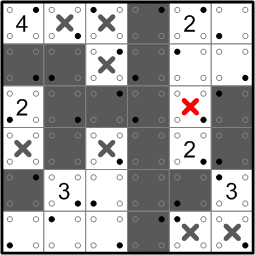
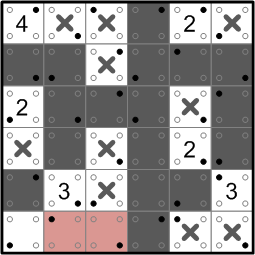
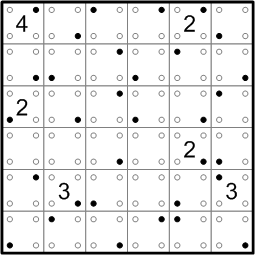 This is the example puzzle exactly as presented on the ænigma paper. We are given that we should darken some of the squares in the grid, satisfying four constraints: (a) that all of the darkened squares form a single connected group, (b) that nowhere exists a 2×2 area that is all darkened, (c) that each connected white region contains exactly one number, and (d) the size of each white region is equal to its contained number.
Are the rules quite clear, then? Jolly good! Let's get started!
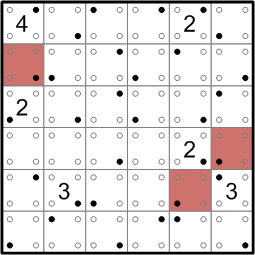 Our first step is to look for places where two numbers are quite close together. Due to rule (c), we must ensure that those pairs of numbers not end up in the same connected white region. This allows us to confidently darken a few squares around the grid.
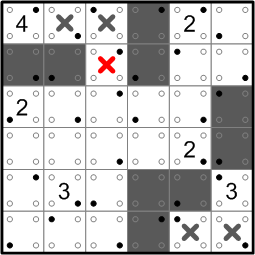
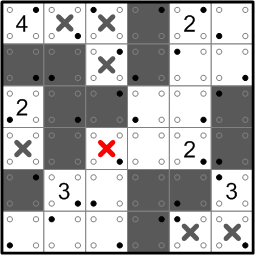
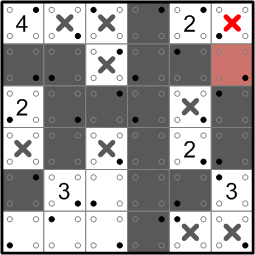
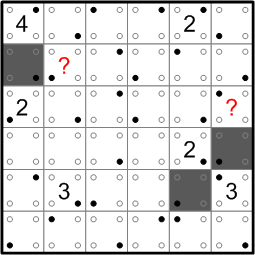 Consider the two squares that I've marked with question marks in this diagram. If they were white, the adjacent darkened squares would be completely cut off from the rest of the darkened group, thus violating rule (a).
 We can therefore darken both of those squares. This kind of inference, in which we notice darkened groups that are threatened with being cut off, is quite common. We will see several more instances of it as we proceed below.
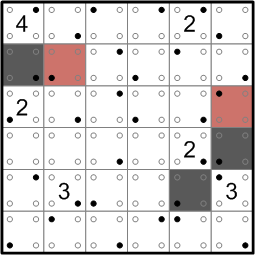
 Now let's work with rule (d), which tells us that, for example, the white region containing the ‘4’ must have 4 squares in it. Knowing that, we can deduce that the two squares to the right of the ‘4’ must be white, and members of the 4's white region. I always mark those squares that I know to be white with little X's, and I strongly recommend that you always do the same.
The very same analysis leads us to conclude that the two squares at the lower right corner of the grid must also be white, in this case, members of the nearby 3's white region.
 By the same rule, we can now see that the white region in the lower right corner must be complete: it contains a ‘3’ and it contains 3 white squares. Thus, we can ‘cap it off’ with a darkened square.
 The 4's white region, back at the top, is in danger of colliding with the ‘2’ to its right. Rule (c) tells us that each white region can have only one number, so we must not allow these two (partial) white regions to meet. A new darkened square is the result.
 Returning to our workhorse rule (a), we see that the darkened square we just added at the top is threatened with isolation, as is the darkened square to the left of the ‘3’ in the lower right corner. We once again add darkened squares to stave off the threat.
 The 4's white region now has only one direction in which it can expand to its full required size, so we mark another square as being known to be white.
 That completed the 4's white region, so we once again cap it off with a darkened square.
 Once again scanning the grid for threatened dark sub-groups, we identify the two darkened squares between the ‘4’ and the ‘2’ below it. We are forced to darkened another square to prevent that group's isolation.
 Now it is that ‘2’ with only one direction in which to grow its region, so we mark another white square.
 That completes the 2's white region, so we fence it in completely with two further darkened squares.
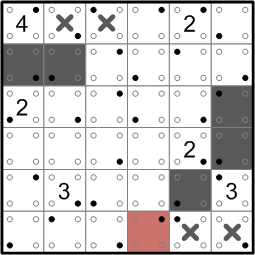
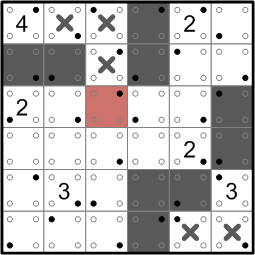
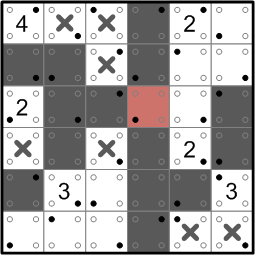
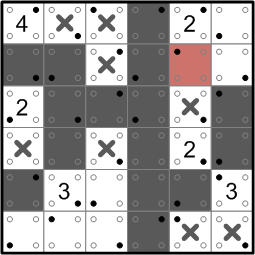
 At last, we are presented with an opportunity to employ rule (b). We mark a square as white in order to prevent the introduction of a 2×2 area that is all darkened.
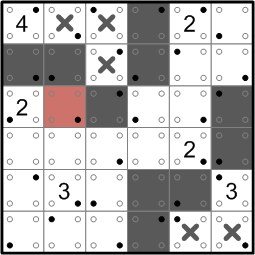
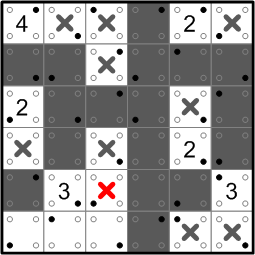
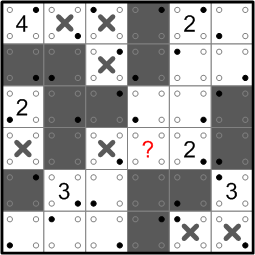 Consider the square I've labeled with a question mark here. If it were white, then the connected white region containing the adjacent ‘2’ would contain at least three squares. That would violate rule (d).
 We can thus conclude that said square must be darkened.
 The sub-group of five darkened squares on the left side of the grid is threatened with isolation, so we once again darken a new square to prevent that.
 The lower-right ‘2’ now has only one direction in which to grow...
 ...and that completes that 2's white region, so we cap it off.
 That leaves the remaining ‘2’ with only one growth path, so we take it, thereby completing that region as well.
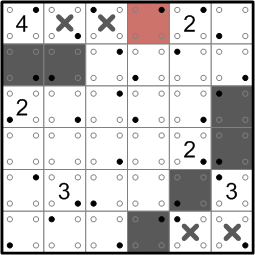
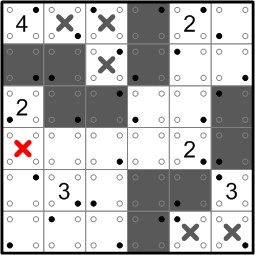
 The white square in the center of the grid isn't yet connected to a number, so its region cannot yet be complete. The region must therefore expand in the only direction available, and thus another square is marked as white.
 That completes the white region containing the ‘3’ in the lower left, so we fence it in with new darkened squares.
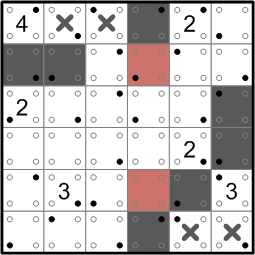
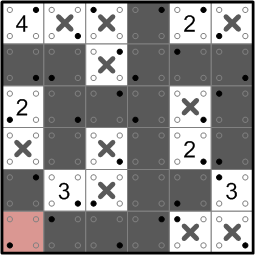 Finally, the darkened square to the left of that ‘3’ is threatened with isolation, so we darken the last remaining square to complete the grid. Well done!
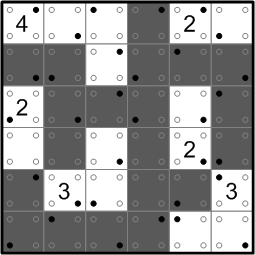 Here we pause for just a moment to appreciate the fruit of our labours thus far. (I've taken the liberty of erasing all of our little X's: we no longer require them, and the grid looks much nicer without them, don't you think?)
All that remains now is to discover this ænigma's final answer.
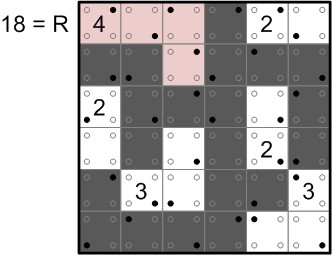 We are told to sum up the values of the filled dots in each white region,
 according to the diagram I've reproduced to the right.
Working from left to right in the 4's white region, we have filled dots with values 4, 2, 8, and 4, which sums to 18. We then translate that sum into a letter by finding the 18th member of the alphabet. As you've no doubt deduced from the diagram, that member is ‘R’.
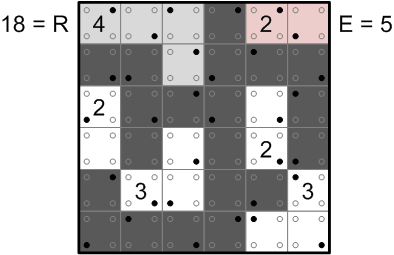 Moving on across the grid, the filled dots in the 2's white region have values 4 and 1, summing to 5, and the fifth letter of the alphabet is ‘E’.
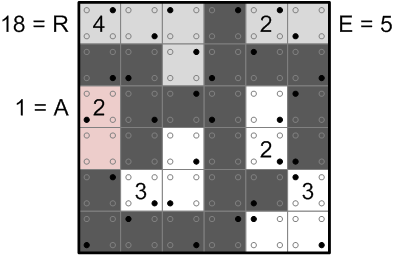 We are told to read off our answer in left-to-right, top-to-bottom order, as if each white region's number had been replaced by that region's computed letter. Thus, our next region to consider contains the ‘2’ on the left edge of the grid.
This region contains only one filled dot, with value 1, so our letter is ‘A’.
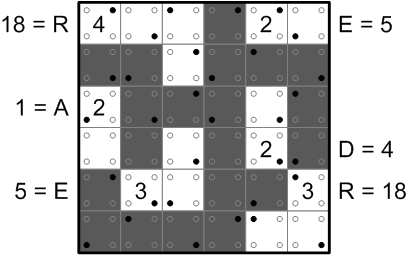 After computing the letters for the remaining white regions in the same fashion, we can at last read off our answer, a most appropriate word: ‘READER’.
Bravo, we've done it! Now return to your efforts on the original ænigma!
|
Shopping Cart |