Adalogical Ænigma #4Walkthrough of the Example PuzzleGreetings, gentle patron!
What follows is a detailed description of how one might go about solving the example puzzle shown on the ænigma paper. I hope that you find it useful. For an abundance of other solving aids, please return to the main page for this ænigma.
Dedicated to your puzzle enjoyment,

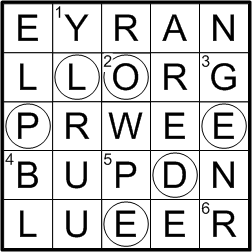
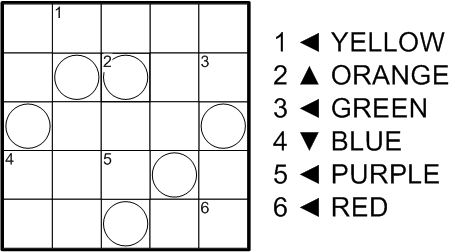 This is the example puzzle exactly as presented on the ænigma paper. We are given that we should fill in all of the listed words, each starting in the square with the given number and proceeding initially in the given direction. We're to fit in one letter per square, twisting and turning as we like after each one, up, down, left or right. Although letters can, and often will, be shared between words, they may not be reused within a single word.
Are the rules quite clear, then? Jolly good! Let's get started!
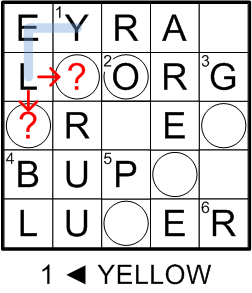
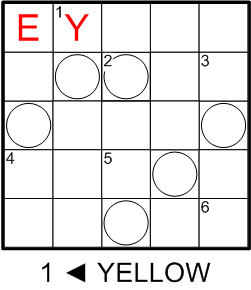 When undertaking any serious endeavour, I always find it best to begin at the beginning, don't you? In this case, that means starting to enter letters from clue #1. According to that clue, the “Y” must be placed in the square labelled “1”, and the following letter, “E”, must occupy the next square to the left.
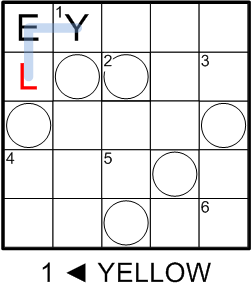 The rules tell us that each word proceeds letter by letter, square by adjacent square, up, down, left, or right. In this case, our word “YELLOW” has but one direction available in which to proceed: it must bend downwards for the next letter, “L”. At this early stage, we cannot extrapolate any further on the placement of this word: there are two options for how to proceed, and we have no information to guide us in choosing between them.
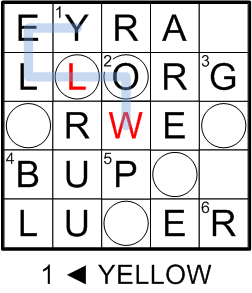
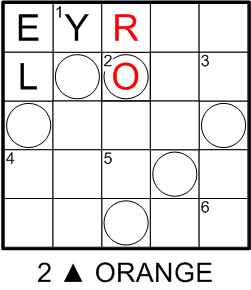 We thus turn our attention to the succeeding clue, #2. Once again, the clue explicitly instructs us how to write in the first two letters, beginning in the square labelled “2” and thence proceeding upward.
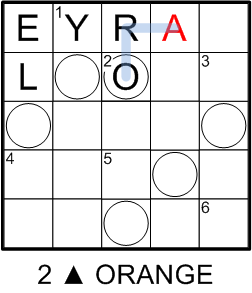 As in our work with clue #1, there is only one direction left in which to proceed to the next letter of “ORANGE”, so our path must turn to the left.
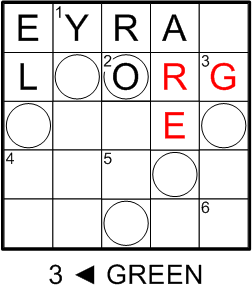 Turning our attention next to clue #3, we see the same pattern repeat: we fill in the first two letters of “GREEN” as directed by the clue and then have but one option for where to place the third letter.
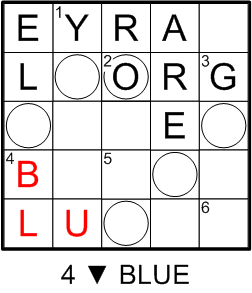 Clue #4 proceeds exactly according the script laid down by the first three clues, ...
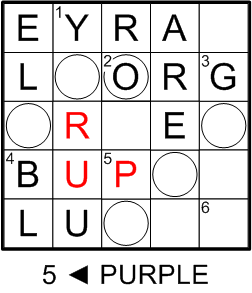 ... and clue #5 does much the same.
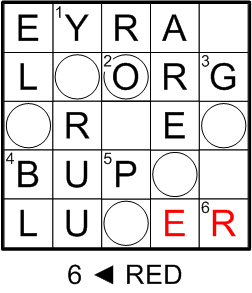 For clue #6, however, we must content ourselves with just laying in the first two letters of “RED”; we have no information as yet to sway our placement of the third letter in this case.
 Now that we have made a first circuit through all of the clues, let us bring our attention back to the beginning again. For clue #1, we still have two options for how we might proceed in placing the fourth letter of “YELLOW”. However, it is easy to see, I hope, that one of those choices could not work out well for us. Were we to place the second “L” below the first one, we would be left with no direction in which to carry on; we could not thence proceed to place the “O”.
 The second “L” of “YELLOW” must therefore be placed to the right of the first one. From there, we have no choice but to accept the kind offer of the “O” from “ORANGE”, to be shared as the fifth letter of “YELLOW”, and finally to place the remaining letter, “W”, in the formerly empty square below that.
With that, we have finished off the first of our six clues! Huzzah!
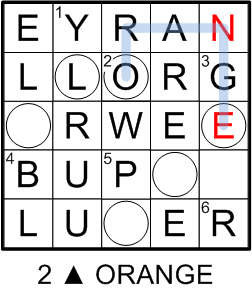 As it happens, we are now in prime condition to finish off clue #2 as well! There remains but one square in which to place the “N” of “ORANGE”, after which we are forced bend our course downward to share the “G” of “GREEN”, and from there the only option is to place the final “E” in the square one spot further down the grid.
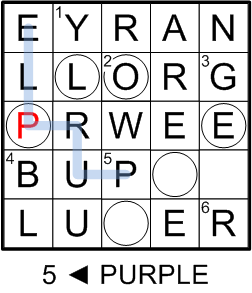 Everything is now falling into place (as it were). Next for us is clue #5, where we have only one choice for the location of its fourth letter, “P” and, thence, must share the final “L” and “E” with letters earlier laid down by “YELLOW”.
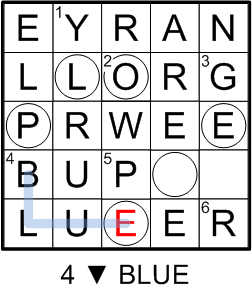 For some time now, clue #4 has been (figuratively) screaming for our attention, as the placement of its final letter has long been unambiguous.
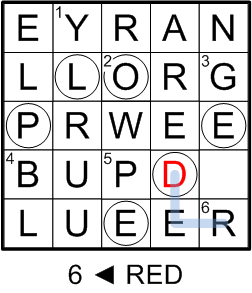 With that sorted, the final “D” of “RED” is left with but a single possible placement, and thus clue #6 joins its completed compatriots.
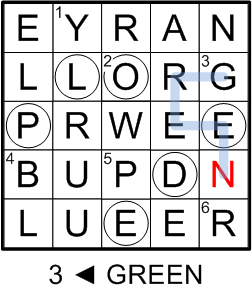 Finally, we can see only one way to place the final “N” of “GREEN”, thereby completing clue #3 and the grid as a whole. Well done!
 Here we pause for just a moment to appreciate the fruit of our labours thus far.
All that remains now is to discover this ænigma's final answer.
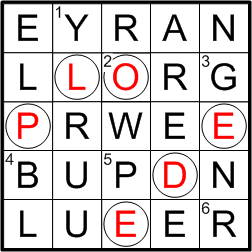 We are told to gather up all of the letters written within each smaller shape inside the squares. In this example, there is only one such shape, the circles. These six letters must then be rearranged to form a single word. Can you see it?
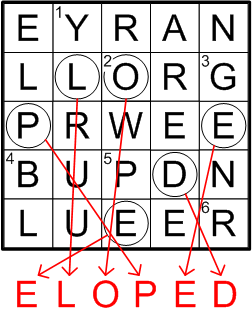 It will, I am sure, have taken you only a modest effort to see a most appropriate solution word for this romantic æ's example: ‘ELOPED’.
Bravo, we've done it! Now return to your efforts on the original ænigma!
|
Shopping Cart |