Adalogical Ænigma #6Walkthrough of the Example PuzzleGreetings, gentle patron!
What follows is a detailed description of how one might go about solving the example puzzle shown on the ænigma paper. I hope that you find it useful. For a copy of the ænigma itself, along with an abundance of other solving aids, please return to the main page for this ænigma.
Dedicated to your puzzle enjoyment,

 This is the example puzzle exactly as presented on the ænigma paper. We are given that we should place lights on some of the white squares such that (a) any black square with a number has exactly that many lights adjacent to it, horizontally and vertically, (b) all of the white squares are ‘lit’ by the beams of lights, and (c) no light is lit by another light. The beams travel only horizontally and vertically from each light, and they are blocked by black squares.
Are the rules quite clear, then? Jolly good! Let's get started!
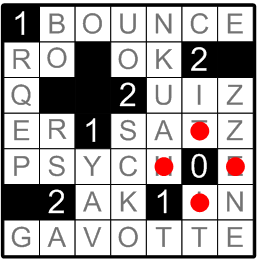 We begin by putting big spots in all of the white squares surrounding the black square labelled with a ‘0’, since that label implies that no lights may be horizontally or vertically adjacent to that black square.
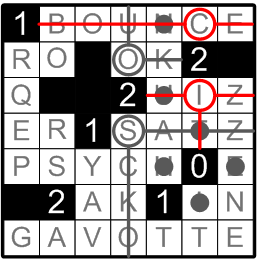
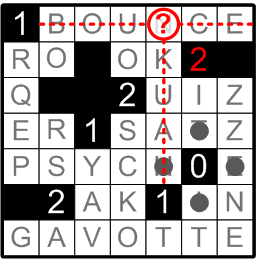 Pray consider the black square in the upper-right corner that is labelled with a ‘2’. There are three adjacent white squares, among which two must contain lights, according to rule (a). Suppose that a light were to be placed in the white square just above and to the left of that black square, as indicated by the question mark in the illustration. Those of its beams travelling downward and to the right would pass through two of the three white squares adjacent to our ‘2’, thereby preventing us, by rule (c), from placing further lights in either of those two squares. That would leave us with but one adjacent square in which to place a light, thus compelling us to violate rule (a).
 We may thus conclude that no light may be placed in the square previously indicated by the question mark. By the very same reasoning, we can conclude the same about the white square two spaces below that one.
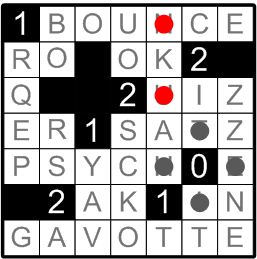
 Now let us examine the black square labelled with a ‘2’ that is near the center of the grid. Given our conclusions from the previous step, we may now see that only two adjacent white squares remain in which lights might be placed. That is exactly the number we require, by rule (a), so we find ourselves with no choice but to place lights in both of them.
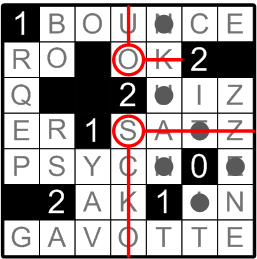
Note that I've carefully drawn in the full extent of the beams of both lights. This practice, which some might naïvely presume to be excessive, is in fact nearly essential to successfully solving such an ænigma. It simultaneously makes abundantly clear which squares have been lit so far (recall that rule (b) requires us eventually to have lit all of the white squares), and which squares may not, therefore, have lights placed in them.
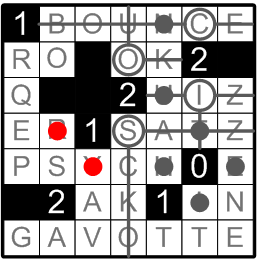
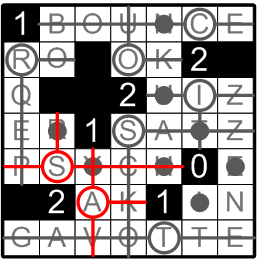
 Now we may see that one of the white squares previously available for placing a light next to the other, nearby ‘2’ square has just been illuminated by a light placed in the preceding step. That leaves said ‘2’ square with exactly two remaining adjacent white squares, so we must fill those squares with lights as well.
 The black square labelled with a ‘1’ near the center of the grid has already had its full quota of lights placed next to it. By rule (a), no further lights may be placed in adjacent white squares, so we may illustrate that fact with more large spots.
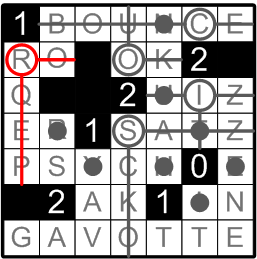 The ‘1’ square in the upper left corner has exactly one adjacent white square left unlit, so it must itself contain a light.
 A similar situation exists for the ‘1’ square near the bottom of the grid: only one adjacent white square might still accommodate a light, and thus another placement is forced upon us.
 Continuing this domino-like chain of deductions, we can now place the required two lights adjacent to the ‘2’ square near the lower-left corner of the grid.
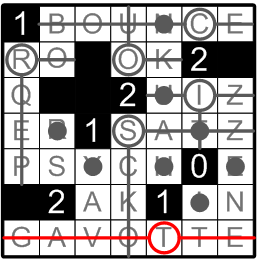
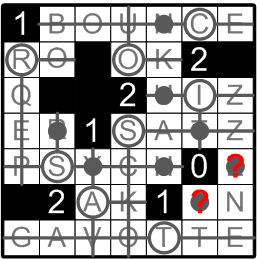 We are nearly finished! Please now consider the two squares indicated by question marks in the illustration. Our earlier deductions have informed us that neither square may itself contain a light, and yet, by rule (b) both squares remain still be be lit by some light (or lights). Where could that light be placed? In both cases, only a single candidate square remains: the adjacent white square labelled with an ‘N’.
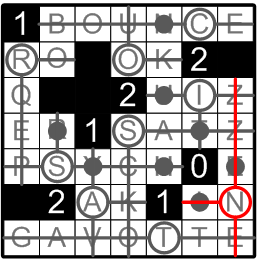 Finally, therefore, we place a light on that ‘N’ square, thereby completing our task of lighting every square in the grid. Well done!
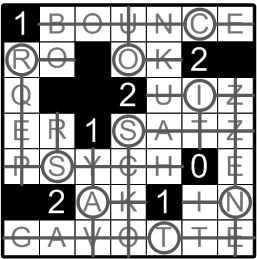 Here we pause for just a moment to savor our complete enlightenment. I've taken the liberty of erasing the various large spots that previously littered our grid, leaving us just the placements of the lights and the paths of their beams. A very elegant sight, don't you agree?
All that remains now is to discover this ænigma's final answer.
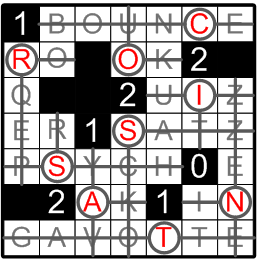 We are told to read out the letters labelling those squares now occupied by lights, working left to right, and top to bottom.
Following those instructions, we end up spelling out a delectibly apropos final answer word: “CROISSANT”.
Bravo, we've done it! Now return to your efforts on the original ænigma!
|
Shopping Cart |